오늘 데이터 api 가져오기 학교 실습에서 처참히 패배했다.
그래서 절치부심해서 그래도 명색히 프론트엔드 개발자 준비중인데 연습을 해보려한다.
아래 사이트는 fetch 를 통해서 api를 가져오는 코드를 나열한 사이트이다.
그 다음 사이트들은 여러 api와 그 데이터 형식 예시를 만나볼 수 있는 사이트이다.
맨 아래 링크는 async ,await 사용 예시 설명 블로그.
연습해보자. ㅎㅎ
다음 주에 응용해야된다.
https://jsonplaceholder.typicode.com/guide/
JSONPlaceholder - Guide
Guide Below you'll find examples using Fetch API but you can JSONPlaceholder with any other language. You can copy paste the code in your browser console to quickly test JSONPlaceholder. Getting a resource fetch('https://jsonplaceholder.typicode.com/posts/
jsonplaceholder.typicode.com
https://mixedanalytics.com/blog/list-actually-free-open-no-auth-needed-apis/
Big List of Free and Open Public APIs (No Auth Needed) [2023]
An API (Application Programming Interface) allows you to send and receive data from a remote server, like querying a database. This is helpful when you’re building an app or pulling metrics for…
mixedanalytics.com
https://github.com/public-apis/public-apis
GitHub - public-apis/public-apis: A collective list of free APIs
A collective list of free APIs. Contribute to public-apis/public-apis development by creating an account on GitHub.
github.com
4. fetch를 이용한 데이터 요청, 응답
오늘 진행했던, fetch를 이용하여 HTTP 요청을 보내고, 응답을 받는 연습을 정리해볼겸 포스팅하려고 한다. fetch에 대해서는 제대로된 정리글을 다시 포스팅할 것이기 때문에 문제 위주로 적으려고
jhbljs92.tistory.com
보충

Auth : 로그인 필요여부
HTTPS : 보안 연결 제공 여부
CORS : HTML에서의 보안상 요청 거부(YES) , No는 그냥 받아 볼 수 있음.
실습
아래 데이터 사용


먼저 데이터 구조를 살펴보기 위한 코드로 데이터 구조를 살핀다.

1차시도
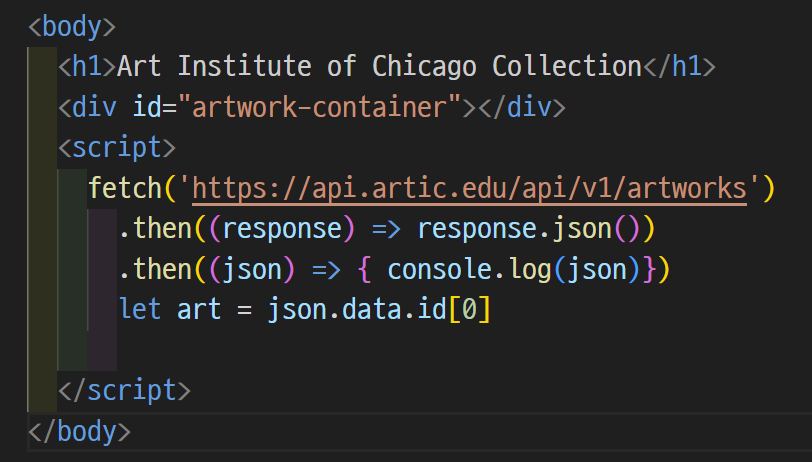
<틀린이유>
수의 유효 범위: then 블록 내에서 선언된 art 변수는 그 블록의 로컬 범위 안에서만 유효합니다. 이 변수에 접근하려면 fetch의 비동기 작업이 완료되고, 해당 then 블록의 코드가 실행되는 시점이어야 합니다.
결과적으로, API의 응답이 필요한 변수는 fetch 함수 호출이 완료된 후, 즉 .then() 메소드 내부에서만 안전하게 사용할 수 있습니다. 이렇게 하지 않으면, API 응답이 도착하기 전에 해당 변수에 접근하려고 할 때 값이 undefined나 기대하지 않은 상태일 수 있습니다.
예를 들어, fetch 다음에 바로 let art = json.data.id[0] 같은 코드를 실행하면, fetch의 결과가 아직 도착하지 않았기 때문에 json 객체가 정의되지 않은 상태일 것이고, 이는 오류를 발생시킵니다.
무사히 읽어온 데이터 값을 출력했다.


하지만 아직 불러들어온 문자나, 이미지 링크를 container에 저장해서 띄우는 법을 잘 모르겠다.
관련 코드를 본적이 많고, 클론 코딩도 많이 해봤다.
하지만 정작 잘 모른다. 이래서 스스로 짜보는 연습이 중요하다.
art 변수의 값을 HTML 태그로 출력하려면, JavaScript를 사용하여 동적으로 HTML 요소를 생성하고, 해당 값을 이 요소에 추가한 다음, 이 요소를 원하는 위치에 삽입해야 합니다.
즉, js script 안에서 html 태그를 js 코드로 불러와서 삽입시켜야 한다는 의미.
<화면에 출력 시키기>
-> container 태그의 자식 노드를 삽인 하는 것이 곧 시각적 출력으로 이어진다.
appendChild 메서드: appendChild는 DOM API의 일부로, 한 요소를 다른 요소의 자식으로 삽입하는 데 사용됩니다. 이 메서드를 사용하여 요소를 추가하면, 해당 요소는 DOM 트리의 일부가 되고, 웹 페이지에 시각적으로 표시됩니다.
웹 페이지의 렌더링: 웹 브라우저는 DOM 트리를 기반으로 웹 페이지를 렌더링(화면에 표시)합니다. 즉, DOM 트리에 변화가 생기면(예를 들어, 새로운 요소가 추가되면) 브라우저는 이를 감지하고, 변경된 DOM 구조에 따라 웹 페이지를 다시 렌더링합니다.
따라서, appendChild를 사용하여 <p> 태그를 artwork-container라는 <div> 태그의 자식으로 추가하면, 이 <p> 요소는 DOM 트리에 새로운 노드로 추가되고, 웹 브라우저는 이를 감지하여 변경된 구조에 맞게 웹 페이지를 다시 렌더링합니다. 이로 인해 사용자는 웹 페이지에 새로 추가된 <p> 태그의 내용을 볼 수 있게 됩니다.
무사히 데이터 문자열이 출력되었다.

|
1
2
3
4
5
6
7
8
9
10
11
12
13
14
15
16
17
18
19
20
21
|
<body>
<h1>Art Institute of Chicago Collection</h1>
<div id="artwork-container"></div>
<script>
fetch('https://api.artic.edu/api/v1/artworks')
.then((response) => response.json())
.then((json) => {
console.log(json)
let art = json.data[0].id // data의 0번째 객체의 id 값을 불러와서 저장.
console.log(art) //출력
const artElement = document.createElement('p')//새로운 <p> 요소를 생성합니다.
artElement.textContent = `Artwork ID: ${art}`//생성한 <p> 요소의 텍스트 내용을 art 변수의 값으로 설정합니다.
const container = document.getElementById('artwork-container') //id가 artwork-container인 요소를 찾아 container라는 변수에 할당
container.appendChild(artElement)
//이제, 생성한 <p> 요소(artElement)를 container 요소의 자식으로 추가합니다. appendChild 메서드는 어떤 요소를 다른 요소의 자식으로 삽입하는 데 사용됩니다.
// 이 경우, <p> 태그가 artwork-container라는 <div> 태그의 자식으로 추가되어, 웹 페이지에 표시됩니다.
})
</script>
</body>
|
cs |
<이미지와 여러 데이터 불러오는 코드>

|
1
2
3
4
5
6
7
8
9
10
11
12
13
14
15
16
17
18
19
20
21
22
23
24
25
26
27
28
29
30
31
32
33
34
35
36
37
38
39
40
41
42
43
44
45
46
47
48
49
|
<!DOCTYPE html>
<html lang="en">
<head>
<meta charset="UTF-8">
<meta name="viewport" content="width=device-width, initial-scale=1.0">
<title>Art Institute of Chicago Collection</title>
<style>
.artwork {
margin-bottom: 20px;
}
.artwork img {
max-width: 100%;
height: auto;
}
</style>
</head>
<body>
<h1>Art Institute of Chicago Collection</h1>
<div id="artwork-container"></div>
<script>
fetch('https://api.artic.edu/api/v1/artworks')
.then((response) => response.json())
.then((json) => {
const artworks = json.data;
const container = document.getElementById('artwork-container');
artworks.forEach((artwork) => {
const div = document.createElement('div');
div.className = 'artwork';
const title = document.createElement('h2');
title.textContent = artwork.title;
const img = document.createElement('img');
img.src = `https://www.artic.edu/iiif/2/${artwork.image_id}/full/843,/0/default.jpg`; // 예시 URL, 실제 URL은 API 구조에 맞게 조정 필요
img.alt = artwork.thumbnail.alt_text;
div.appendChild(title);
div.appendChild(img);
container.appendChild(div);
});
});
</script>
</body>
</html>
|
cs |
데이터 구조 분석.
api 제공 사이트의 문서를 차근차근히 읽어 보니
저렇게 하라고 되어있더라...ㅎㄷㄷ
직접 image_id라는 데이터가 어디있는지도 파보고 까보고, 바꿔보고 했는데
알고보니 콘솔창이 데이터구조를 많이 요약해서 일부만 출력해놨는데... 그걸 넘어서서 아래까지 다 꼼꼼히 읽어봐서
데이터 구조를 파악해야 하더라.
사이트 설명 : 우리는 iiif라는 구조를 사용하는데 이미지 출력하려면 아래처럼 해야되라고 써놧음
찾아보니 api제공 사이트에 예시가 있었네... 이래서 관련 문서 읽어보는 연습을 하는 거구나? 싶다.
IIIF Image API
We deliver our images via the IIIF Image API 2.0 (opens new window). Our IIIF URLs have the following structure:
https://www.artic.edu/iiif/2/{identifier}/{region}/{size}/{rotation}/{quality}.{format}
We recommend the following URL structure for most use-cases:
https://www.artic.edu/iiif/2/{identifier}/full/843,/0/default.jpg
Let's jump right into an example. Here's how you can construct IIIF URLs:
- Retrieve one or more artworks with image_id fields. Here are a few ways of doing so:Let's go with the first one, La Grande Jatte (opens new window). Your response will look something like this:
-
{ "data": { "id": 27992, "title": "A Sunday on La Grande Jatte — 1884", "image_id": "1adf2696-8489-499b-cad2-821d7fde4b33" }, "config": { "iiif_url": "https://www.artic.edu/iiif/2", } } -
# La Grande Jatte https://api.artic.edu/api/v1/artworks/27992?fields=id,title,image_id # La Grande Jatte and The Bedroom https://api.artic.edu/api/v1/artworks?ids=27992,28560&fields=id,title,image_id # Top two public domain artworks https://api.artic.edu/api/v1/artworks/search?query[term][is_public_domain]=true&limit=2&fields=id,title,image_id - Find the base IIIF Image API endpoint in the config.iiif_url field:We recommend that you avoid hardcoding this value into your applications.
-
https://www.artic.edu/iiif/2 - Append the image_id of the artwork as a segment to this URL:
-
https://www.artic.edu/iiif/2/1adf2696-8489-499b-cad2-821d7fde4b33 - Append /full/843,/0/default.jpg to the URL:
-
https://www.artic.edu/iiif/2/1adf2696-8489-499b-cad2-821d7fde4b33/full/843,/0/default.jpg
<관련 문서를 뜯어보는 연습 필요>
정확한 사용법 이해: 문서는 API나 서비스의 기능, 매개변수, 사용 방법 등에 대한 정확한 정보를 제공합니다. 이를 통해 잘못된 가정으로 인한 오류를 방지할 수 있습니다.
효율적인 문제 해결: 문서는 자주 발생하는 문제들과 그 해결 방법을 제공할 수 있으며, 이를 통해 개발 시간을 단축하고 효율을 높일 수 있습니다.
새로운 기능 및 최적화: 문서를 통해 최신 기능이나 업데이트, 성능 최적화 방법 등을 알 수 있어, 서비스를 최대한 활용할 수 있습니다.
예제와 사용례: 많은 문서에는 구체적인 코드 예제나 사용례가 포함되어 있어, 실제 적용 방법을 쉽게 이해할 수 있습니다.
커뮤니티 및 지원: 문서는 관련 커뮤니티, 추가 지원, 피드백 제공 방법 등에 대한 정보를 제공할 수도 있습니다.
'🪢node > node 실습' 카테고리의 다른 글
| mern 로그인기능(2)(node실습)[라우팅 분해하기] (0) | 2024.02.20 |
|---|---|
| mern 로그인 관리기능(1)(node실습)[rest api, req.body란?] (0) | 2024.02.20 |
| Thunder client 사용해보기 [get , post , put, delete] (0) | 2023.11.01 |